

The Adobe Illustrator files associated with the images in the online image gallery are designed to be relatively easy to edit and adapt. However, some knowledge of how Illustrator works is required in order to make the best use of the files. Some instruction on Illustrator was given in Workshop 2, held in November 2017, and the pdf guides to using Illustrator are still available in the departmental OneDrive. However, two aspects of Illustrator are key to being able to edit images – the use of layers within a file, and the ability to combine elements from separate files.
Gill will be writing detailed step-by-step guides to these topics and these guides will be made available as pdf files. In the meantime, this blog post gives an overview of how to combine elements from two different, but related, Illustrator files and, with a minimum of editing, create a file that contains the desired image. The example input files are shown in the header image, together with the output image.
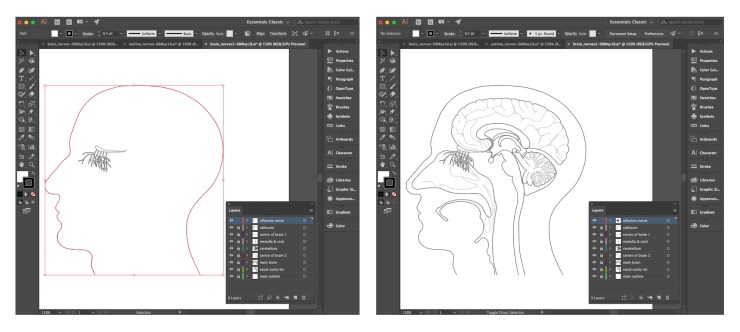
First take a starting file, which contains most of the elements you require – in this case, we are using a detailed image of the human head, showing all of the anatomy. Save the file under a new name, just in case you want to go back to the original at any point. A detailed image file like this should contain a lot of layers, as shown below, left. Click on the ‘eye’ icon in the Layer window to switch the visibility of each layer off and on, so that you a familiar with which elements are on which layers – hopefully the layer names will also help. Switch off the visibility for all of the layers that you don’t think you will need, as shown below, right:
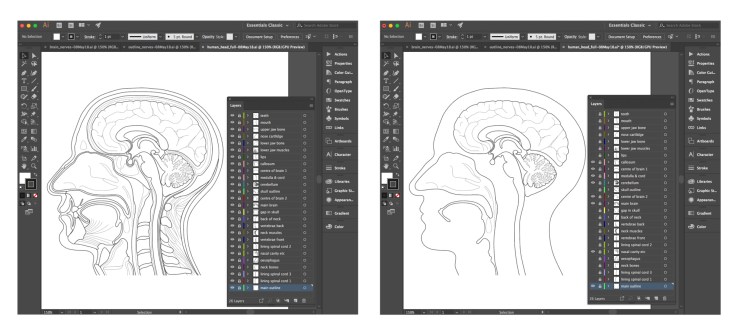
If you are confident that you will no longer need the invisible layers, they can be deleted to make the file a little simpler.
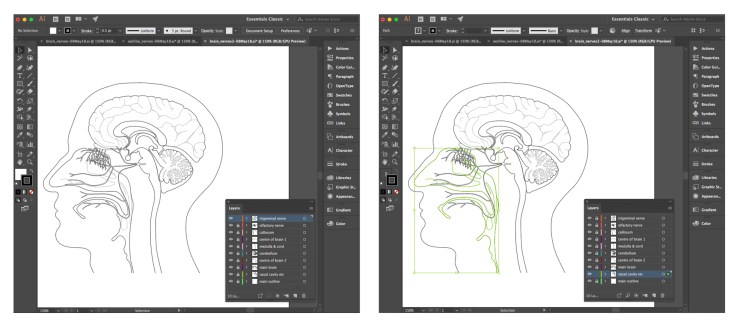
If you wish to add an olfactory nerve and a trigeminal nerve to this image, then you need to find another Illustrator file that contains those elements, as shown below:
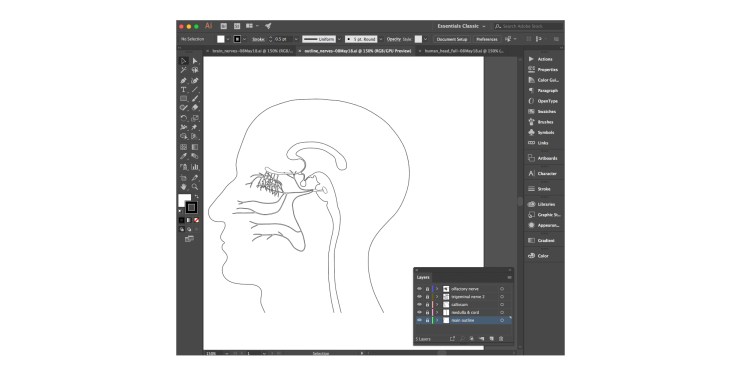
This file comes from the same set of images as the starting file, which means that the nerves will be the right size to fit straight in, without any re-sizing. The fact the file also contains the same main outline as the starting file means that the outline can also be used to help position the nerves in the right location.
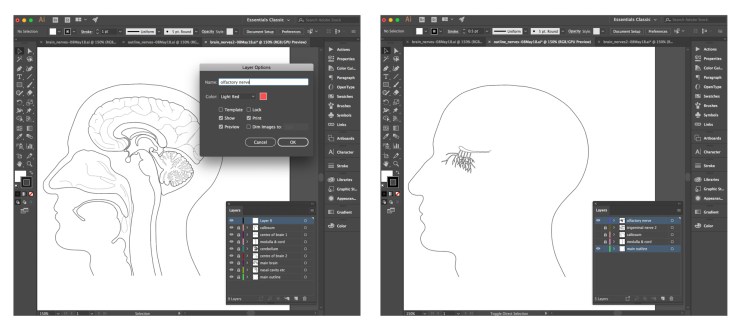
The nerves should be placed on separate layers when they are copied into the starting file, so the first thing to do is to create a new layer in that file, and name it appropriately, as shown below, left. Note that this new layer is not locked – it has no padlock icon next to it in the Layer window. Elements can only be copied from or to unlocked layers. Therefore you must unlock the appropriate layers in the file you are copying from, as shown below, right. In this case, the remaining layers have been made invisible, to make it clearer what is being copied.
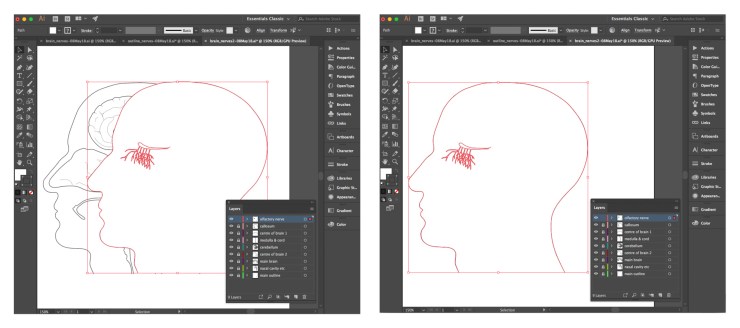
Keeping both Illustrator files open, select both the olfactory nerve and the main head outline. Copy them, select the new layer in the starting file and paste. Both the olfactory nerve and the main outline are now on the same layer in the starting file, as shown below, left. The new layer is at the top, so the newly copied head outline now conceals the rest of the image. However, you can see that it is slightly offset from the correct location. Keeping both elements selected, you can use the arrow keys to nudge them into the correct position, as shown below, right:
By then selecting just the head outline, as shown below, left, you can delete it by pressing the backspace key. This then leaves the olfactory nerve in the correct location, as shown below, right:
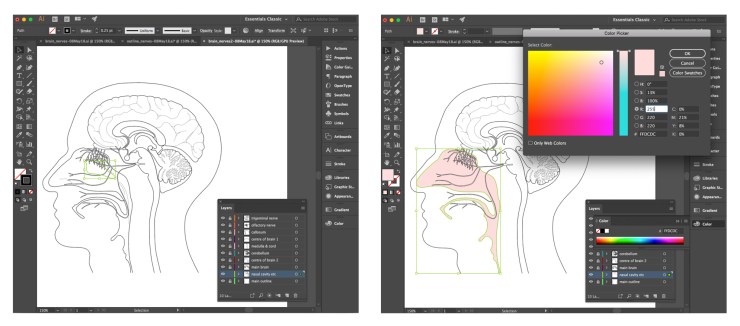
In this instance, these files have been created specifically to be compatible, so no further editing is needed. The steps can be repeated for the trigeminal nerve, resulting in a file that contains both of these elements, each on their own layer, as shown below, left. The trigeminal nerve appears on top of the olfactory nerve – to put the olfactory nerve on top, simply move its layer above the trigeminal nerve layer in the Layer window. You may decide that the internal lines of the nasal cavity are detracting from the nerves and these lines should be removed. Unlock the layer containing the nasal cavity, so that it can be edited, as shown below, right:
Select each of the internal lines and use the backspace key to delete them, as shown below, left. You can also give the nasal cavity a colour fill and remove the black outline, to ensure that the nerves stand out more from the background, as shown below, right:
To use the two existing Illustrator files to create a third file, as shown below, took only minutes to accomplish in this case. The fact that the two files had been created specifically to fit with each makes the whole process much easier.
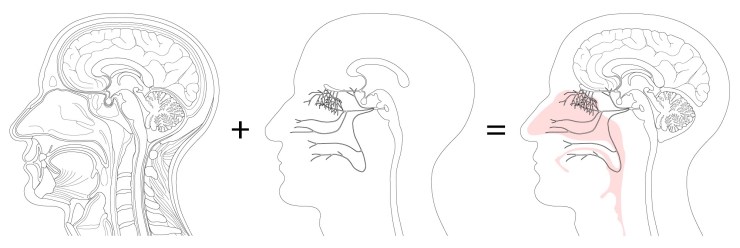
In this way a whole range of individual files can be quickly produced, using just a few key related files as starting points.
Future blog posts will describe how to deal with Illustrator files that are not related and still make the combined output file appear as a coherent single image.
