
A hands-on guide to using Adobe Illustrator
This workshop was a practical, hands-on session, to allow participants to gain a working knowledge of Adobe Illustrator software. The functionality covered was sufficient to allow the participants to create and/or edit the type of images currently included in the CNS image gallery and the neurographical Instagram feed, and to generate their own conceptual figures. Pdf handouts were made available to all department members, prior to the workshop, that described and demonstrated all of the functionality that would be used during the workshop. Example Illustrator files, used to demonstrate some of the functionality, were also made available.
There were approximately 20 participants in the workshop, most of whom had not used Illustrator before. The plan in the workshop was to cover both basic Illustrator functionality and also the techniques used to draw the kind of figures that had been discussed in workshop 1. This plan proved to be somewhat ambitious and, despite continuing the workshop for an additional 30 minutes, there was insufficient time to cover the final topic.
However, the following topics were covered during the workshop:
1. Starting up Illustrator – opening existing files; creating new files; setting up the main working window; adding rulers and guides.
2. Drawing straight lines and basic shapes – using the ‘pen’ tool; introducing stroke and fill colours; drawing straight lines; creating basic shapes; using the ‘arrow’ selection tools; moving, adding and deleting individual points; scaling and rotating objects.
3. Drawing curved lines and complex shapes – using the ‘pen’ tool to draw curves; editing individual points; drawing complex shapes; creating smoothly varying curves; reflecting objects.
4. Creating regular shapes – using the ‘shape’ tool; creating rectangles, ellipses and circles; copying and pasting shapes; using ‘smart guides’ to organise shapes.
5. Stroke, fill and compound paths – changing line weight and style; creating dashed lines; creating arrows; specifying and changing stroke and fill colours; making compound paths.
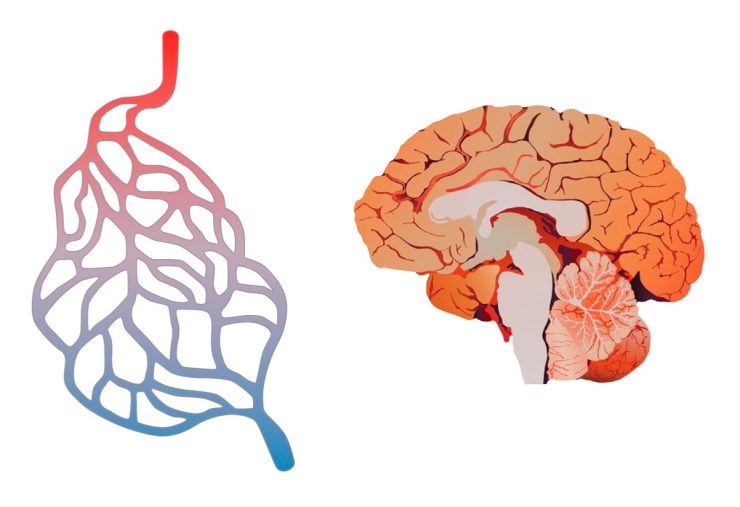
Using compound paths to create networks of vessels had previously been described in this blog post and the participants were given an example Illustrator file that contained the network shown below.

6. Colour modes, colour gradients and transparency – defining the document colour mode; the difference between RGB and CMYK colours; selecting colours; defining and editing colour gradients; specifying the transparency of an object.
The use of colour gradients to represent a blood network and to add some realism to an anatomical image was demonstrated in two example Illustrator files, shown below.
7. Using layers effectively – using the Layers window menu; planning the order of layers; examples of using layers to create images; using the blur effect to create highlights / lowlights on layers.
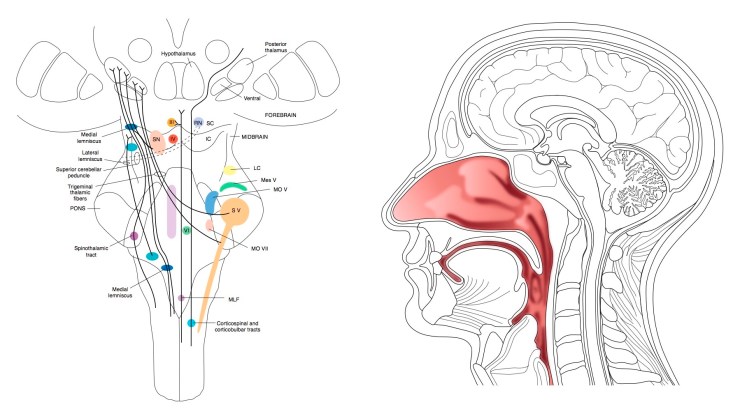
The use of layers is key to creating images that can be easily edited and adapted, and this has also been discussed during stage 3 of workshop 1. Several example Illustrator files were provided to show how the layers are used, with two shown below.
8. Text and annotation – creating text boxes, choosing typefaces and fonts; editing character and word spacings; justifying text; adding text along a drawn line; using text overflow options.
9. Importing images and objects – importing image files and other Illustrator files; using image files as a reference; drawing individual elements from a reference image; importing objects from other Illustrator files; grouping objects; sampling colours from image files and objects.
Gill only demonstrated manual drawing of placed images and a question was asked regarding the automatic tracing of images. This option does exist and is designed primarily to allow illustrators to digitise their own drawings. It requires strong and clear contrasts between the drawn lines and the background in order to trace the image successfully, and will place the entire image on a single layer. In Gill’s experience, automatic tracing also inserts a lot of control points, which can make subsequent editing of a traced image more difficult and time-consuming. Automatic tracing is unlikely to work well on complex conceptual figures, although it may work on a scientist’s own drawings, depending on how they are drawn. Gill had therefore deliberately avoided showing this option, as being able to draw manually means that any image or visual element can be drawn and edited as required, to create a bespoke conceptual figure. By contrast, automatic tracing requires a near-perfect image to start with.
Following the workshop, there was some discussion (via email) about the issue of copyright and how this relates to conceptual figures, particularly if parts of them have been traced, or referenced, from existing figures. It was never Gill’s intention that existing figures should be traced in their entirety (unless it is to show them as examples and then they are clearly labelled as re-drawn images, as on the neurographical instagram feed). This was another reason why workshop participants were not shown how to automatically trace whole figures. Copyright is a very important issue, particularly when publishing in journals, and Gill will put together a document outlining the do’s and don’t of copyright and how it relates to conceptual figures. She will also add a blog post on this subject, showing exactly how some of the images used in the workshop 1 activity were produced, using several different references, combined with freehand drawing.
There was no time to cover the final topic during the workshop, but this is covered in the pdf guides.
10. Exporting files – saving files in Illustrator format, saving files as a pdf, exporting a jpeg image file, exporting a png image file.
Conclusions from Workshop 2
As mentioned previously, the experience of running this pilot workshop showed that there was too much material to cover in the allotted time, particularly for a relatively large number of participants with limited experience of using Illustrator. Because the session overran, several participants had to leave before the end. In their feedback, some participants suggested that a follow-up session could be useful, to concentrate more on the details of drawing images and producing figures.
If the workshop was to be repeated, perhaps it would be better to spilt it into two shorter sessions. The first would cover only the basics of Illustrator – essentially sections 1-6, plus 8 and 10. A second session could then be arranged for those participants who are interested in taking things further, and want to practice drawing in Illustrator. This would cover the key sections 7 and 9, which describe a method for creating figures using ordered layers and imported images, as well as describing the associated functionality. Participants could work on their own images and figures, with Gill giving help and advice during the session. This second session would have to be limited to a relatively small number of participants, certainly no more than ten, to ensure everyone received adequate guidance.
