

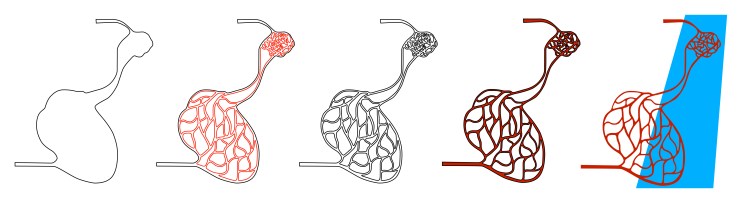
Drawing a network of blood vessels, or similar, for a figure can appear to be a complicated task. However, using the ‘compound path’ option in Adobe Illustrator can make it relatively straightforward. The image below shows the steps involved in creating a blood vessel network for the hypothalamus and pituitary gland.
First, draw around the outline of the entire network. Then draw the individual spaces within the network. Select all of these objects and make them into a compound path. They all now appear outlined in the same colour and act as one object. Now when this object is filled with colour, only the area between the main outline and the drawn spaces is filled. The spaces themselves remain unfilled and we can see any objects that are behind them, as demonstrated by the blue shape.
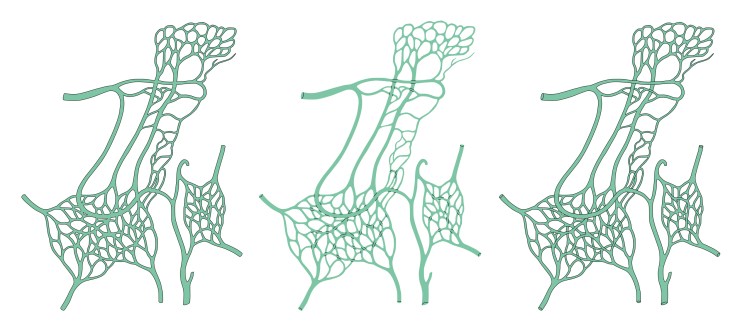
This approach works for a simple network, with no overlapping of the individual vessels. If, however, the vessels need to appear as if they are intertwined, with some lying over the top of others, then an additional step is required, as shown in the image below. A layer is inserted in front of the main network and extra black outlines are drawn in this layer. When these extra lines are viewed together with the main black outline, they give the impression of intertwined vessels. Curved black lines have also been added to the ends of vessels, to make them appear as rounded tubes.
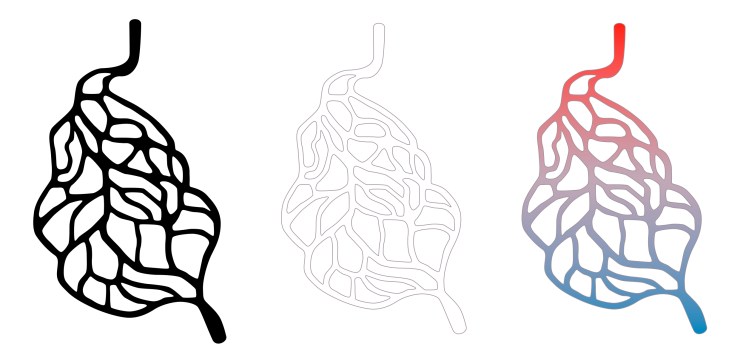
Another useful option in Illustrator is to use colour gradients when filling a network of blood vessels. This can give the appearance of transitioning from arteries to veins, as shown below.
Step-by-step guides to making compound paths and using colour gradients in Adobe Illustrator will be given in the upcoming workshop 2.
