
One of the topics in the upcoming workshops will be how to construct images in Adobe Illustrator. The appropriate use of layers can result in an image that can then be easily edited, deconstructed or simplified for use in future conceptual figures. This is much more useful than producing a single, uneditable, image that can only be used in one article or presentation.
The approach of utilising layers in Illustrator can be applied to any type of image but is particularly useful for anatomical images. The example below shows how the image of an anatomical brain can be constructed in Illustrator, and then modified to produce a simpler version of that image.
Let’s assume that we are starting with a reference image, such as the photograph of a mid-sagittal section of a human brain, although the process would be the same if we did not have a reference.
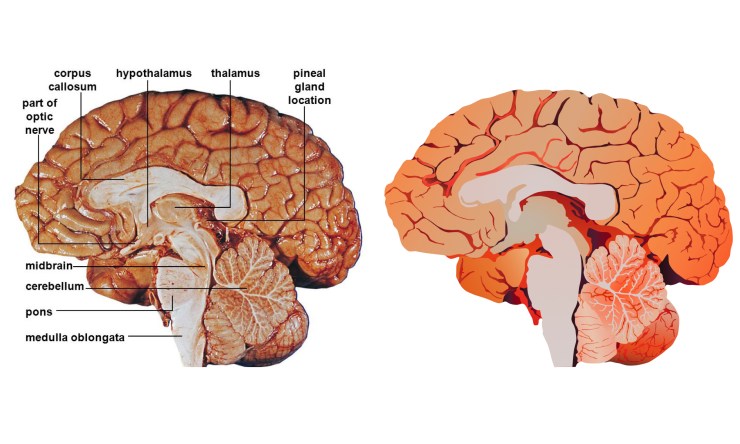
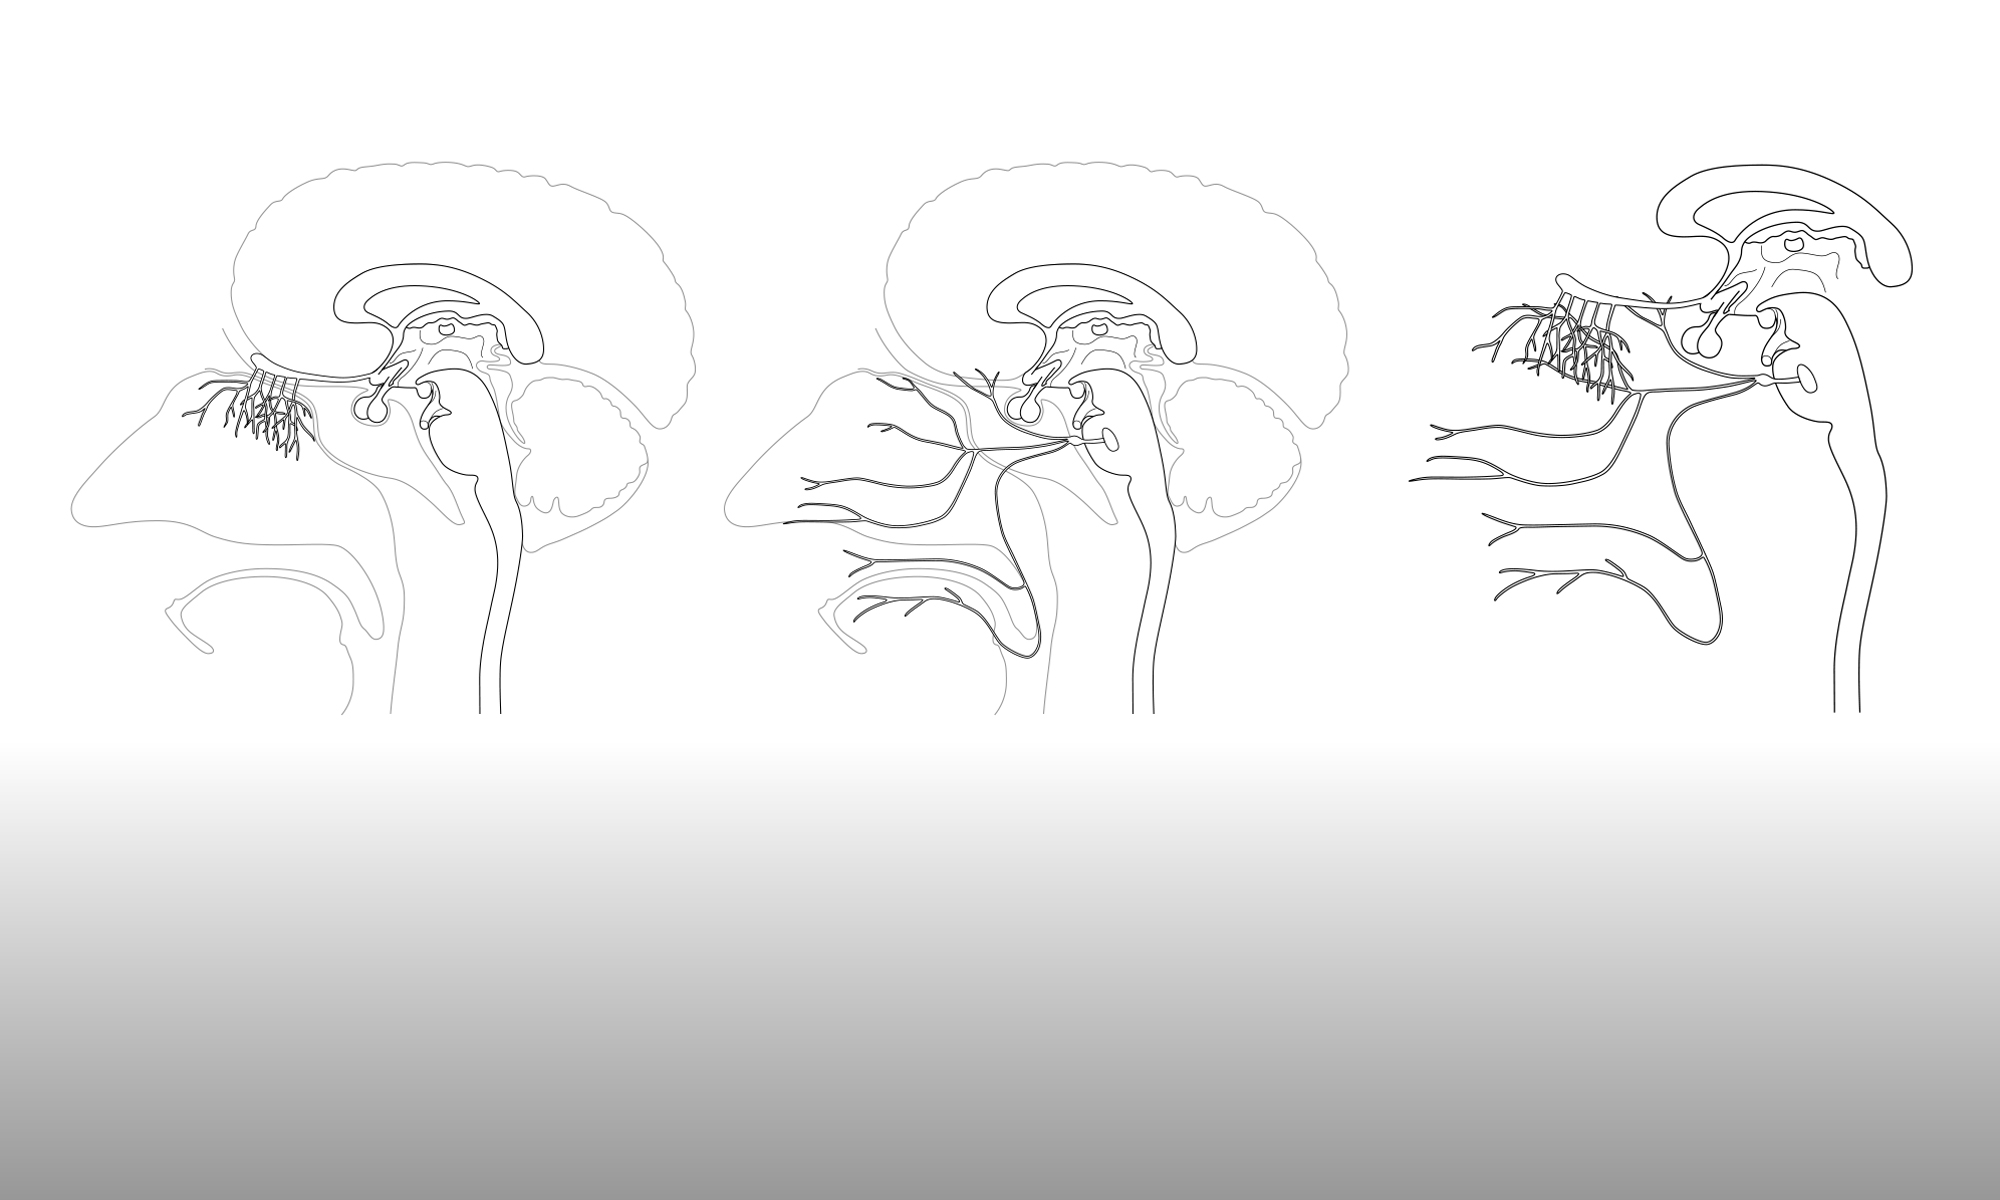
Before drawing anything, we should spend some time considering how the image could be simplified and broken up into separate areas of similar colour. Each of these areas will then be drawn on a separate layer in Illustrator. In this case, the areas will be based mainly on the brain anatomy, although there will be some areas, such as the dark shadows in the photograph, which are not anatomical shapes but that can be included to aid the realism of the final drawing.
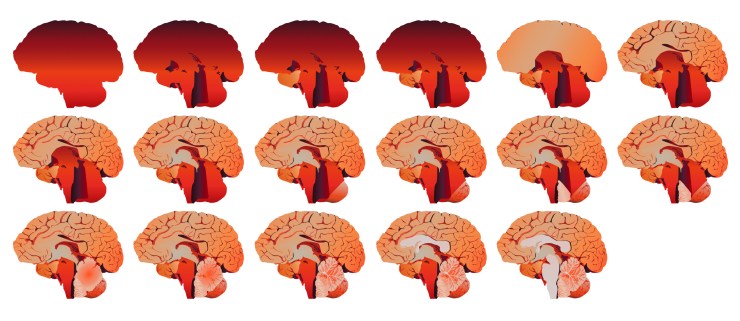
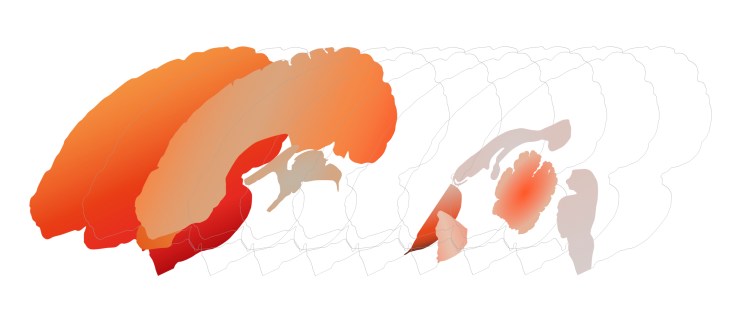
For example, the cerebellum is an obvious area that can be separated out. But we can further divide the cerebellum into the main area, the pale-coloured vessels and the darker vessels and each of these elements can be drawn on a separate layer in Illustrator. Following this method for all of the areas of the brain photograph results in seventeen separate layers in Illustrator, as shown below. Note that one of the layers is simply an outline of the entire brain.
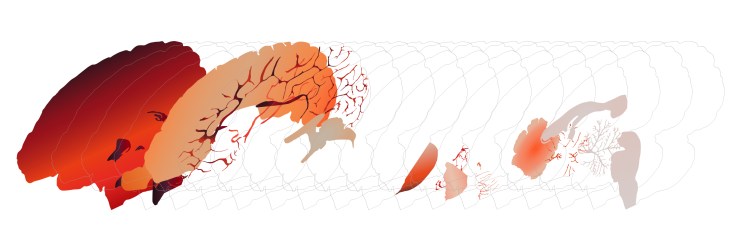
By ordering the layers appropriately in Illustrator, the separate elements combine to build up the final, detailed image of the brain, as shown below.
Bear in mind that the drawn shapes in the deeper layers do not need to be completely accurate, if parts of them will then be covered by the shapes in the shallower layers. Like a piece of embroidery, the final image just has to look good from the front – how it looks from behind is not important.
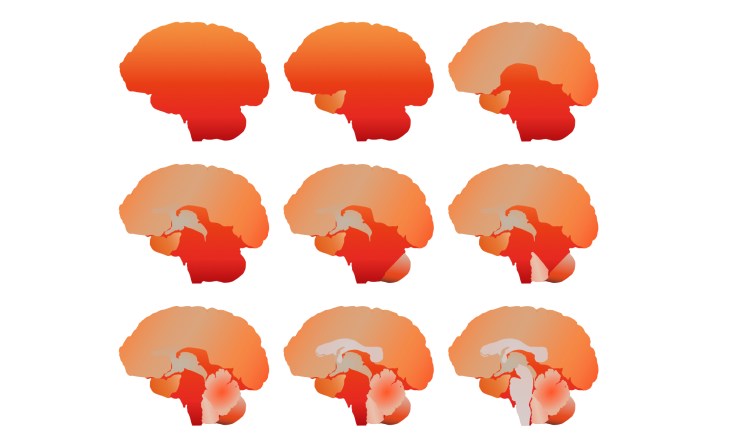
However, if we wish to produce a simplified version of the brain image, by removing some of the layers, then the deeper layers may require some editing, as shown below.
Here, nine of the original layers were used to produce a simplified version of the image. But the first layer, which covers the whole brain, has been changed in colour in order to fit in better with the subsequent layers.
The original 17-layer image was used to produce all of the related images included in the CNS image gallery. Building a detailed image as a starting point takes time initially but means that many other images can then be quickly and easily generated.
The same process for a more diagrammatic figure will be demonstrated in a future blog post.

One Reply to “”